| Welcome | Zaurus | Projects | Papers | Contact |
| Mac OS X USB driver | ||
| Mac OS X cross compiler | ||
| Mac OS X tools for Qtopia | ||
| Qtopia and Mac OS X (mini tutorial) |
This page explains very briefly how to create Qtopia applications using Mac OS X. It is assumed that you have already compiled native and cross versions of Qtopia.
You won't find any details about Qt and Qtopia
here, but there are plenty of tutorials on the web
(and also in the documentation included with Qt - take a look
at the folder "<src-dir>/qtopia.mac/qt-x11/doc"). If you
find something on the web, please be careful with instructions about
setting
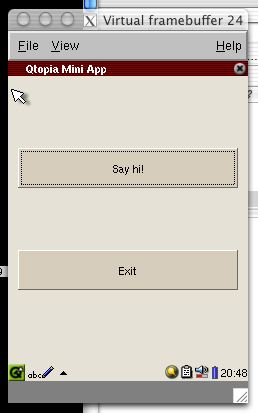
First, create a directory that will contain all files for the application. It will be just a minimal example with two push buttons and a dialog box. In order to display any GUI elements, we need a main widget for the application. The class for this widget is defined in a header file (called "mini.h" here) like this:
#include <qlayout.h>
#include <qwidget.h>
#include <qpushbutton.h>

class Mini : public QWidget {
    Q_OBJECT
public:
    Mini(QWidget* parent = 0, const char* name = 0, WFlags flags = 0);
    QPushButton* _sayHiButton;
    QPushButton* _exitButton;
public slots:
    void sayHi();   // Slot connected with "Say hi" button
    void exit();    // Slot connected with Exit button
protected:
    QGridLayout* _miniLayout;
};
The two data members of type QPushButton point to
the buttons used in the mini application. The slots
sayHi() and exit() react to clicks on
these buttons. Finally, _miniLayout points to the
layout used (a simple grid layout).
The following is the implementation of the main widget. Place this in a file called "mini.cpp":
#include "mini.h"

#include <qpushbutton.h>
#include <qlayout.h>
#include <qmessagebox.h>


// say hi
void Mini::sayHi() {
    QMessageBox::information(this, tr("Mini"), tr("hi"));
}


// quit the application
void Mini::exit() {
    this->close();
}


// ctor
Mini::Mini(QWidget* parent, const char* name, WFlags flags)
    : QWidget(parent, name, flags) {

    setCaption(tr("Qtopia Mini App"));

    _miniLayout = new QGridLayout(this);

    _sayHiButton = new QPushButton(this);
    _sayHiButton->setText(tr("Say hi!"));
    _sayHiButton->setMaximumHeight(40);
    _miniLayout->addWidget(_sayHiButton, 0, 0);

    _exitButton = new QPushButton(this);
    _exitButton->setText(tr("Exit"));
    _exitButton->setMaximumHeight(40);
    _miniLayout->addWidget(_exitButton, 1, 0);
    _miniLayout->setMargin(10);

    connect(_sayHiButton, SIGNAL(clicked()), this, SLOT(sayHi()));
    connect(_exitButton, SIGNAL(clicked()), this, SLOT(exit()));
}
The last source file for the mini app is the one containing the
#include "mini.h"
#include <qtopia/qpeapplication.h>

int main(int argc, char *argv[]) {
    QPEApplication app(argc, argv);
    Mini m;
    app.showMainWidget(&m);
    return app.exec();
}
You can create a Makefile for a Qtopia application by hand, but it's easier to use Trolltech's tmake. This tool will read a project file with details about the application and create a Makefile from it. Here is how the project file ("mini.pro") for the mini app looks like: TEMPLATE = app CONFIG = qt warn_on debug HEADERS = mini.h SOURCES = main.cpp mini.cpp INCLUDEPATH += $(QPEDIR)/include DEPENDPATH += $(QPEDIR)/include LIBS += -lqpe TARGET = miniThe TEMPLATE basically says whether we have a lib or an application.
The CONFIG entry can be used for configuring the build process (like if a debug
or release version should be built). TARGET is the name of the
executable to create. The rest of the settings determines the sources of the
application and its dependencies. (QPE means "Qt Palmtop Environment" and is
frequently used as an abbreviation for Qtopia.)
Now that you have a project file, you can run tmake to generate a Makefile from it (controlled via environment variables). To make development easier, you can use this script which works like this: > cd /some/path > ./makeenv.sh --srcdir <src-dir> --workdir <work-dir><src-dir> and <work-dir> are the same as the ones used for building the cross-compiler and Qtopia. The script will generate two files: "native.env" and "cross.env". These can be used to set all variables necessary for building and executing native and cross versions of applications. First, let's build a native version of the mini application: > source /some/path/native.env > cd <directory with the mini.pro and source files> > tmake -o Makefile mini.pro > make"native.env" takes care of setting all environment variables (including PATH so that tmake can be found). After that, tmake creates a Makefile, and make finally builds the native version of the mini app. To run the application in the native qtopia environment, start Qtopia and enter the following in an xterm: > source /some/path/native.env > cd <directory with the mini files> > ./miniThe mini app should now show inside qvfb. The last step is to cross-compile the application for use on a Zaurus (or iPAQ running Opie). The easiest way to do this is to re-create the Makefile, but this time for cross-compilation (you can of course also create two distinct Makefiles): > source /some/path/cross.env > cd <directory with the mini files> > make clean > tmake -o Makefile mini.pro > makeYou should now be able to run the mini executable on the Zaurus (and trying to run on the Mac will produce an error message). This was only a very short intruction, and you should go search the web and Trolltech's documentation for more information. Happy hacking!
Last update: 06/14/2003 |